Making a small room feel bigger isn’t about adding bright lights or mirrors; it’s about strategically sculpting perception with light itself.
- High-CRI light reveals textures and color fidelity, creating essential visual depth that pushes walls back.
- Indirect lighting techniques like wall-washing and uplighting erase hard corners and blur physical boundaries.
Recommendation: Begin by analyzing your room’s light not by its brightness, but by its quality (CRI), color temperature (Kelvin), and direction.
The walls of a small room can feel like they’re closing in, creating a sense of confinement that no amount of decluttering can seem to fix. The common advice is often predictable: add mirrors, paint everything white, or simply get a brighter bulb. While these tips have some merit, they only scratch the surface of a much more powerful tool at your disposal: light itself. They treat light as a utility, a simple matter of illumination, rather than as a medium.
As lighting designers, we see a different truth. Space is not just physical; it is perceptual. The key to expanding a room lies not in blasting it with undifferentiated brightness, but in manipulating the physical properties of light—its color, quality, and direction—to trick the eye and sculpt a feeling of expansiveness. This approach moves beyond simple decoration and into the realm of architectural psychology, using light to create depth, define zones, and build a visual hierarchy that makes a room feel both larger and more sophisticated.
This guide will deconstruct the technical and artistic principles we use to achieve this illusion of space. We will move past the generic “ambient, task, accent” formula to explore the real science behind it all, from the hormonal impact of blue light on your perception of intimacy to using sculptural fixtures as architectural anchors. You will learn to see light not just as something that fills a room, but as the tool that defines it.
To navigate this technical and artistic journey, the following sections will break down the core concepts that allow you to sculpt space with light. From the science of color rendering to the art of creating focus, each part builds upon the last to provide a complete strategy for transforming your home.
Summary: How to Layer Lighting to Make Small Rooms Feel Bigger ?
- Why Blue Light in Your Living Room Is Keeping You Awake ?
- LED Color Rendering Index: Why Your Art Looks Dull at Night ?
- The Glare Mistake in Home Offices That Causes Daily Headaches
- Optimizing Smart Bulbs for Automated Mood Transitions
- Sculpture or Canvas: Which Decor Element Anchors a Room Better ?
- Why Lighting Temperature in Your Bathroom Affects Your Sleep Quality ?
- Why Your Mixed Colors Look Muddy Instead of Vibrant ?
- Oil vs Acrylic: Which Medium Suits a Tiny Apartment Studio ?
Why Blue Light in Your Living Room Is Keeping You Awake ?
The conversation about room size often overlooks a critical psychological component: how light temperature affects our sense of intimacy and comfort. Your brain is hardwired to associate the warm, reddish-orange glow of sunset with relaxation and the end of the day. This light signals the production of melatonin, the hormone that regulates sleep. Conversely, the cool, blue-toned light of midday sun signals alertness and activity. When you fill your evening spaces with cool light (typically above 3000K), you are sending a conflicting message to your body, suppressing melatonin and creating a subtle, underlying tension.
This biological response has a direct impact on spatial perception. A tense, alert state makes a space feel more clinical and defined, where every corner is sharp and every boundary is clear. Warm, dim light does the opposite. It fosters relaxation, and as our focus softens, the hard edges of a room begin to blur. This effect, a soft-focus chiaroscuro, makes corners recede and walls feel more distant, increasing the room’s perceptual volume. Research confirms that light temperature is a significant factor, as a bulb of 3000K contains significantly more blue light than a 2700K one, which can interfere with this natural process.
Therefore, controlling the color temperature in your living areas, especially in the hours before bed, is not just about sleep hygiene; it’s a fundamental technique for spatial manipulation. By curating a warm-toned environment (ideally 2700K), you encourage a state of mind where the physical constraints of a room become less imposing, making it feel cozier and more expansive.
LED Color Rendering Index: Why Your Art Looks Dull at Night ?
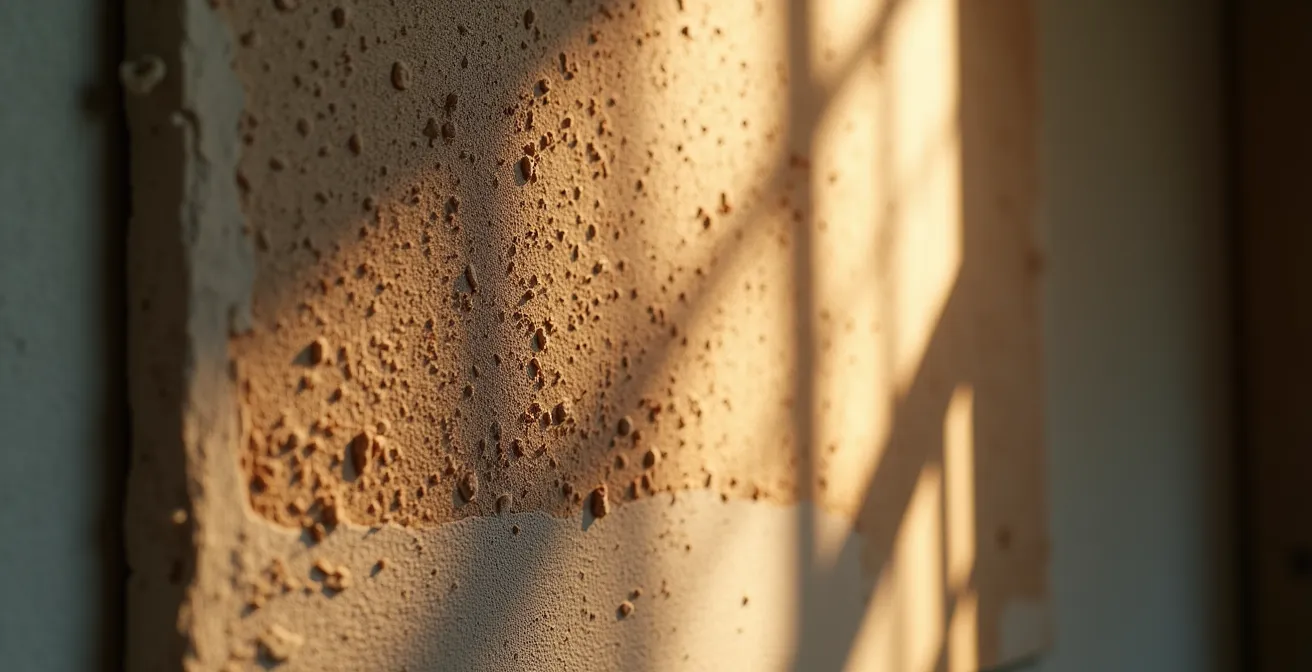
Beyond color temperature, the *quality* of your light is paramount in the fight for perceived space. The Color Rendering Index (CRI) is a scale from 0 to 100 that measures a light source’s ability to faithfully reveal the colors of objects in comparison to a natural light source. A low-CRI bulb (typically below 80) can make colors appear washed out, flat, and lifeless. In a small space, this is disastrous. When walls, furniture, and art lose their color fidelity, they also lose their texture and depth, merging into a monotonous plane that makes the room feel flat and two-dimensional.
This is where high-quality lighting becomes a non-negotiable tool. As lighting experts confirm, lights with a CRI above 90 are transformative. They render colors with accuracy and vibrancy, which in turn reveals the subtle micro-textures of every surface. A painted wall is no longer just a flat color; its slight imperfections and the texture of the paint become visible. A wooden table reveals its grain; a fabric sofa shows its weave. This process is called textural rendering, and it is crucial for creating visual depth.
By revealing these details, high-CRI light creates layers of visual information. Your eye is drawn to these textures, perceiving them as distinct planes at different distances, which inherently makes the space feel more complex and larger. The effect is so powerful that a case study on gallery lighting found that when switching from low to high-CRI LEDs, galleries report spaces feel up to 30% larger. Visitors perceive enhanced color separation and richness, making objects appear more distinct and drawing the eye across the room, effectively expanding its perceived boundaries.
The Glare Mistake in Home Offices That Causes Daily Headaches
Glare is the enemy of perceived space. Often caused by an exposed bulb, a poorly aimed fixture, or reflections off a glossy surface, glare is more than just an annoyance that causes eye strain and headaches—it’s a space-killer. As lighting experts from Lumens Depot point out, “Position glare not just as an annoyance, but as a space-killer. Hotspots and reflective glare create ‘unusable’ visual zones, forcing your eyes away.” These ‘unusable zones’ are areas of such intense brightness that your brain effectively deletes them from the usable footprint of the room, making it feel smaller and more constrained.
The solution is to move from direct, harsh lighting to indirect, diffused light. Techniques like wall-washing (grazing a wall with an even sheet of light) and uplighting (bouncing light off the ceiling) are foundational to a designer’s toolkit. These methods eliminate the single, harsh point source of glare and replace it with a broad, soft luminescence. Instead of creating sharp, dark shadows that chop up a room, they produce gentle, graduated shadows that define form and create a sense of depth. The light source itself becomes invisible, and the surfaces it illuminates become the focus.
This table illustrates the stark difference in how lighting types affect our perception of a room’s size, based on a guide on lighting tricks for small spaces.
| Lighting Type | Visual Effect | Space Perception |
|---|---|---|
| Direct/Glare | Creates harsh shadows and unusable zones | Reduces perceived space by 20-30% |
| Wall-washing/Uplighting | Soft, even illumination | Expands boundaries visually |
| Diffused/Indirect | Gentle shadows define depth | Creates layered perception |
By washing a wall with light, you are essentially erasing a hard boundary. The wall seems to glow from within and recede, pulling the room’s perceived border outward. Uplighting draws the eye upward, creating an illusion of height and airiness. Both techniques replace visual clutter and harshness with a smooth, expansive canvas of light.
Optimizing Smart Bulbs for Automated Mood Transitions
The static nature of traditional lighting is one of its greatest limitations in a small space. A room lit the same way at 9 AM and 9 PM feels monotonous and unresponsive. Smart bulbs and systems offer a solution: temporal space expansion. This is the concept of making a room feel larger and more dynamic by having its lighting change over time, mimicking the natural transitions of daylight.
Automated circadian rhythm schedules are a powerful tool for this. These systems slowly shift the color temperature and intensity of your lights throughout the day. You might wake up to a crisp, cool 5000K light that promotes alertness and gives the room a sense of clean, open space. As the afternoon progresses, the light gradually warms and dims, transitioning to a cozy 2700K in the evening that fosters relaxation and intimacy. This constant, subtle change prevents the space from feeling static and stagnant.
A case study on Philips Hue’s implementation of this technology highlights its effectiveness. Users in small apartments reported that their spaces felt more dynamic and connected to the outside world. The automated shift in chromatic cues—the signals color sends to our brain—created a perception of time passing within the space, which prevented the feeling of being “stuck” in a small box. The room breathes with the day, feeling open and airy in the morning and becoming a warm, protective cocoon at night. This dynamic quality adds a fourth dimension to the space, making it feel infinitely more complex and therefore larger than its physical footprint suggests.
Sculpture or Canvas: Which Decor Element Anchors a Room Better ?
In a small room, every element must be deliberate. A common mistake is to rely solely on ambient, hidden light sources. While techniques like wall-washing are essential for creating a base layer of soft, expansive light (the ‘canvas’), a room without a focal point can feel directionless and bland. To counter this, a designer introduces a visual hierarchy through a statement light fixture. This fixture acts as a ‘sculpture’—an object of beauty and focus that anchors the room and commands attention.
A statement light fixture is the ultimate ‘sculptural’ anchor in a small room. A beautiful pendant or arc lamp can define a zone and draw the eye.
– Interior Design Lighting Expert, How to Layer Lighting Like a Designer
A striking pendant light over a small dining table, an elegant arc lamp curving over a reading chair, or a unique floor lamp in a corner does more than just provide light. It creates a destination for the eye. By drawing attention upward and inward, away from the walls, it distracts from the room’s limited dimensions. This single, strong focal point can define a specific zone—the “dining area” or the “reading nook”—within a larger open space, giving the single room the functional and psychological feel of a multi-room home.
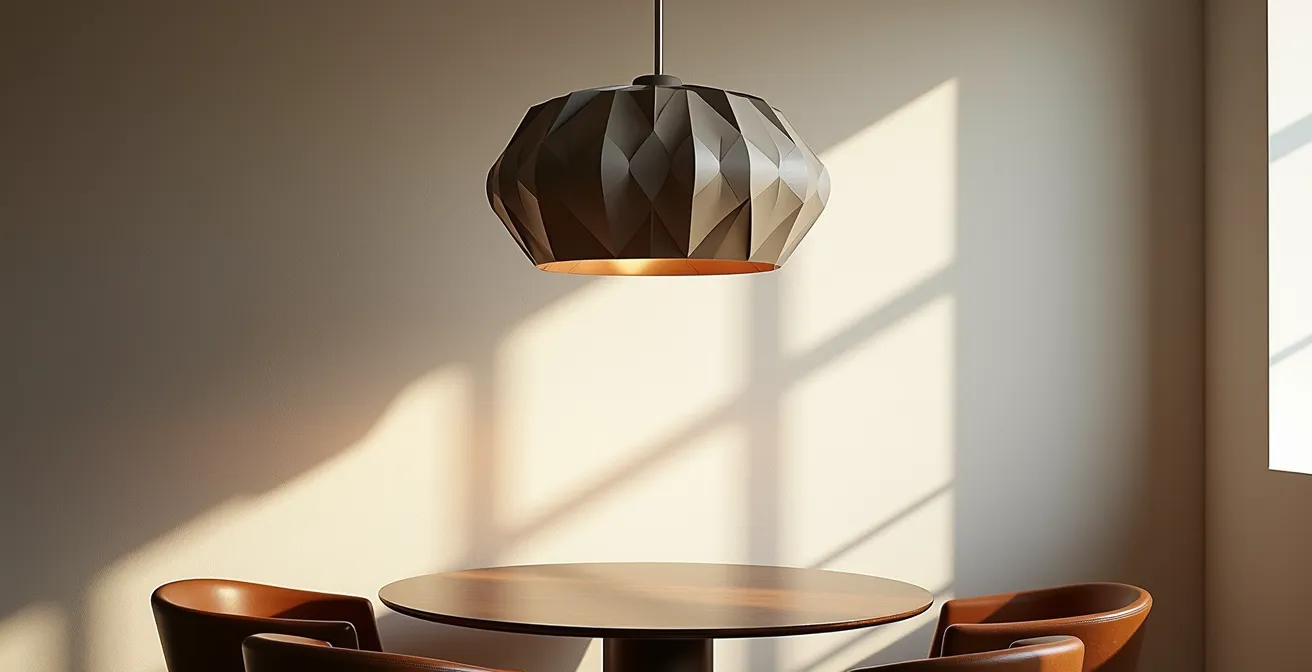
The interplay between the ‘canvas’ of soft, indirect light and the ‘sculpture’ of a statement fixture is where the art of lighting design truly comes alive. The canvas makes the room feel boundless, while the sculpture gives it purpose and a point of interest. Together, they create a balanced composition that is both expansive and intimate, proving that a well-chosen light fixture is the most functional piece of art you can own.
Why Lighting Temperature in Your Bathroom Affects Your Sleep Quality ?
The journey through a home is a sequence of experiences, and the lighting should support a cohesive narrative. A common design flaw is to treat each room as an island, especially the bathroom. Many people install harsh, cool-toned vanity lighting (4000K or higher) for its perceived clarity during morning routines. However, a late-night trip to a bathroom that floods your system with blue light can instantly shatter the warm, relaxing ambiance you’ve carefully cultivated in your living and sleeping areas. It’s a jarring interruption that can disrupt sleep patterns and, on a perceptual level, break the illusion of a single, flowing space.
To maintain spatial and psychological continuity, a ‘bookend’ lighting strategy is essential. This means ensuring the lighting in the first and last rooms of your day—typically the bedroom and bathroom—are in harmony. Both spaces should feature warm, dimmable light (2700K to 3000K) to support the body’s natural circadian rhythm. This creates a seamless transition from the waking world to a state of rest.
In the bathroom, this doesn’t mean sacrificing functionality. The key is layering. Use vertical sconces on either side of the mirror instead of a single overhead fixture. This provides even, shadow-free light on the face for tasks while drawing the eyes upward, creating an illusion of height. When combined with a warm color temperature, the bathroom feels less like a clinical utility space and more like a calming sanctuary, an extension of the bedroom’s restful atmosphere.
Action Plan: The Bookend Lighting Strategy
- Install dimmable 2700K-3000K fixtures in both the bathroom and bedroom to ensure a consistent, warm ambiance across your personal spaces.
- Use vertical sconces beside bathroom mirrors instead of overhead lighting to draw the eye upward and create an illusion of greater ceiling height.
- Maintain this warm temperature throughout all your evening spaces to preserve a seamless and expansive spatial flow from one room to another.
- Add a fixture with a dedicated nightlight mode (around 2200K) for late-night bathroom visits that won’t disrupt melatonin production.
- Audit all points of contact where light is emitted, from overheads to lamps, to ensure a cohesive color temperature strategy.
Why Your Mixed Colors Look Muddy Instead of Vibrant ?
In the quest for layered lighting, a common mistake is to mix color temperatures haphazardly. Having a cool-toned 4000K track light in the kitchen area of a studio that bleeds into a living space with a warm 2700K lamp creates visual chaos. The two temperatures clash, creating a “muddy” or cluttered feeling. Your eye can’t settle, and the space feels disjointed and smaller because its different parts are fighting each other. Cohesion is the bedrock of spatial expansion.
For most small spaces, especially for those new to lighting design, sticking to a single, consistent color temperature throughout the entire space is the safest and most effective strategy. A uniform 2700K glow will create a harmonious, seamless environment where one area flows gracefully into the next, maximizing the feeling of a single, large, and unified space.
However, in multi-functional rooms, a more advanced technique can be used: temperature zoning. This is not a chaotic mix, but a deliberate, subtle differentiation to define functional zones without physical barriers. For instance, a 400 sq ft studio apartment successfully used this method: a slightly cooler, more alert 3000K was used for a small desk area to encourage focus, while the sleeping and lounging area was bathed in an intimate 2500K. The transition was soft, and the differentiation created the illusion of two distinct “rooms,” making the single space feel more functional and an estimated 25% larger.
This table clarifies the strategic choices:
| Strategy | Best For | Visual Effect |
|---|---|---|
| Single Temperature (2700K) | Beginners, small spaces | Harmonious, seamless glow |
| Zoned Temperatures | Multi-functional rooms | Defined areas within space |
| Mixed Without Strategy | Never recommended | Chaotic, cluttered feeling |
The key is intention. Whether you choose a single temperature for harmony or zoned temperatures for function, the decision must be a conscious one aimed at creating a cohesive visual language.
Key Takeaways
- Light quality (CRI > 90) is more important than quantity for creating depth and revealing textures that push walls back.
- Use indirect light (wall-washing, uplighting) to erase hard corners and expand a room’s perceived boundaries.
- Maintain a consistent warm color temperature (2700K) in the evenings to create a cohesive, expansive, and psychologically comfortable atmosphere.
Oil vs Acrylic: Which Medium Suits a Tiny Apartment Studio ?
Thinking like an artist is the final step in mastering lighting. In painting, an artist might use an “oil” underpainting to establish the foundational structure and mood, then add flexible “acrylic” layers for detail and highlights. The same philosophy applies to lighting a small space. Your lighting strategy should blend permanent, architectural fixtures with flexible, portable ones.
The best strategy, like with art, is to blend the two. Use a foundational ‘oil’ layer of good ambient light and then add flexible ‘acrylic’ layers.
– Lighting Design Professional, Layering Light: How to Create the Perfectly Lit Space
The ‘oil’ layer is your architectural lighting. This includes high-quality, high-CRI recessed lights, a track system for wall-washing, or hidden cove lighting that provides the broad, ambient, and indirect light we’ve discussed. This is your foundation. It’s built-in, thoughtfully placed, and sets the overall tone and perceived size of the room. It’s the canvas upon which you will paint.
The ‘acrylic’ layer is your flexible lighting. This consists of portable fixtures: a floor lamp for a reading corner, a table lamp on a side table to create a pool of intimacy, or a directional task light on a desk. These are the elements you can move and adjust. They create the focal points, the highlights, and the shadows—the chiaroscuro effect—that bring the room to life. They allow the space to adapt to your needs, whether you’re working, entertaining, or relaxing. A good rule of thumb is a 60/40 split: 60% of your light should come from the fixed ‘oil’ layer, and 40% from the flexible ‘acrylic’ layer.
By combining these two approaches and integrating them (ideally through a smart home system for unified control), you create a lighting scheme that is both structurally sound and dynamically alive. It provides the expansive feeling of a well-lit space while also offering the intimate, human-scale moments that make a house a home.
By moving beyond the simple act of illuminating a room and embracing the art of sculpting with light, you can transform even the smallest apartment. The next logical step is to perform a lighting audit of your own space, identifying sources of glare and opportunities for layering. Start with a single room and begin to apply these principles to create a space that not only looks bigger, but feels fundamentally better to live in.