Contrary to popular belief, a “Zero-VOC” label on a paint can does not guarantee your indoor air is safe; the real issue lies in the long-term chemical off-gassing from synthetic binders.
- Standard acrylic and latex paints are essentially liquid plastics that seal walls, trapping moisture and continuously releasing chemicals for years.
- Natural mineral paints, like clay and lime, create a breathable surface that actively manages humidity and does not contain synthetic polymers.
Recommendation: Prioritize paints based on their fundamental chemistry (mineral vs. synthetic) rather than relying solely on VOC marketing labels for a truly healthy home environment.
That persistent, low-grade headache you can’t seem to shake might have a more insidious cause than stress or lack of sleep. It could be originating from the very walls around you. For years, we’ve been told the familiar “new paint smell” is a temporary inconvenience, a sign of a freshly decorated space. We’re advised to ventilate well for a few days and then assume the air is clear. But what if this assumption is fundamentally flawed? What if the materials we use to beautify our homes are slowly degrading our indoor air quality for years after the smell has faded?
The common advice focuses on Volatile Organic Compounds (VOCs), prompting a rush towards “Low-VOC” or “Zero-VOC” products. While this is a step in the right direction, it often misses the bigger picture. The problem isn’t just the initial volatile compounds, but the very nature of modern paint. Most standard paints are acrylic or latex-based, which are essentially liquid plastics. When applied, they form a non-breathable film that can trap moisture and, more importantly, continue to release a cocktail of semi-volatile and non-volatile chemicals—a process known as off-gassing—for months, or even years.
But if the solution isn’t just about chasing a “Zero-VOC” sticker, what is it? The key lies in shifting our perspective from surface-level marketing to a deeper understanding of material science—a core principle of building biology. The real distinction is between synthetic, film-forming paints and natural, mineral-based finishes that work in harmony with your home’s structure. This article will deconstruct the myths around paint safety, exploring the fundamental differences that determine whether your walls are contributing to a healthy indoor ecosystem or are a source of chronic chemical exposure.
We will delve into the practical application of healthier alternatives, dissect misleading labels, and provide the scientific evidence behind the durability and performance of natural paints. This guide provides the knowledge needed to make an informed decision, moving beyond simple fixes to create a home that truly supports your well-being.
Summary: Uncovering the Hidden Health Risks in Your Walls
- How to Apply Clay Paint for a Professional Finish on Uneven Walls ?
- Low VOC vs Zero VOC: Which Label Actually Guarantees Safety ?
- The Durability Myth: Does Natural Paint Peel Faster Than Acrylic ?
- Cleaning Lime Wash Walls Without Damaging the Finish
- When is the Best Time of Year to Paint Exteriors with Natural Lime ?
- The Red Flags in Contractor Quotes That Signal Future Disasters
- The Ventilation Requirement: Is Oil Painting Safe in a Bedroom ?
- How to Layer Lighting to Make Small Rooms Feel Bigger ?
How to Apply Clay Paint for a Professional Finish on Uneven Walls ?
One of the most appealing aspects of natural paints is their ability to work with a building’s character, not against it. Clay paint, in particular, is celebrated for its rich, matte finish and its capacity to enhance, rather than hide, the subtle imperfections of a wall. Unlike synthetic paints that create a uniform plastic-like sheet, clay paint offers a soft, velvety texture that interacts beautifully with light. Applying it correctly is key to achieving this high-end, professional look, especially on uneven surfaces like old plaster.
The process begins with proper surface preparation. The wall must be clean, solid, and uniformly absorbent. Any untreated or highly absorbent surfaces should be treated with a suitable natural primer. The magic of clay paint lies in its consistency and application technique. It’s not about rolling on a thin, perfect layer; it’s about building coverage with intentional brushstrokes. Using a wide brush in cross-hatched or diagonal patterns allows the paint’s natural texture to create depth and mask minor irregularities in the wall surface, turning potential flaws into features.
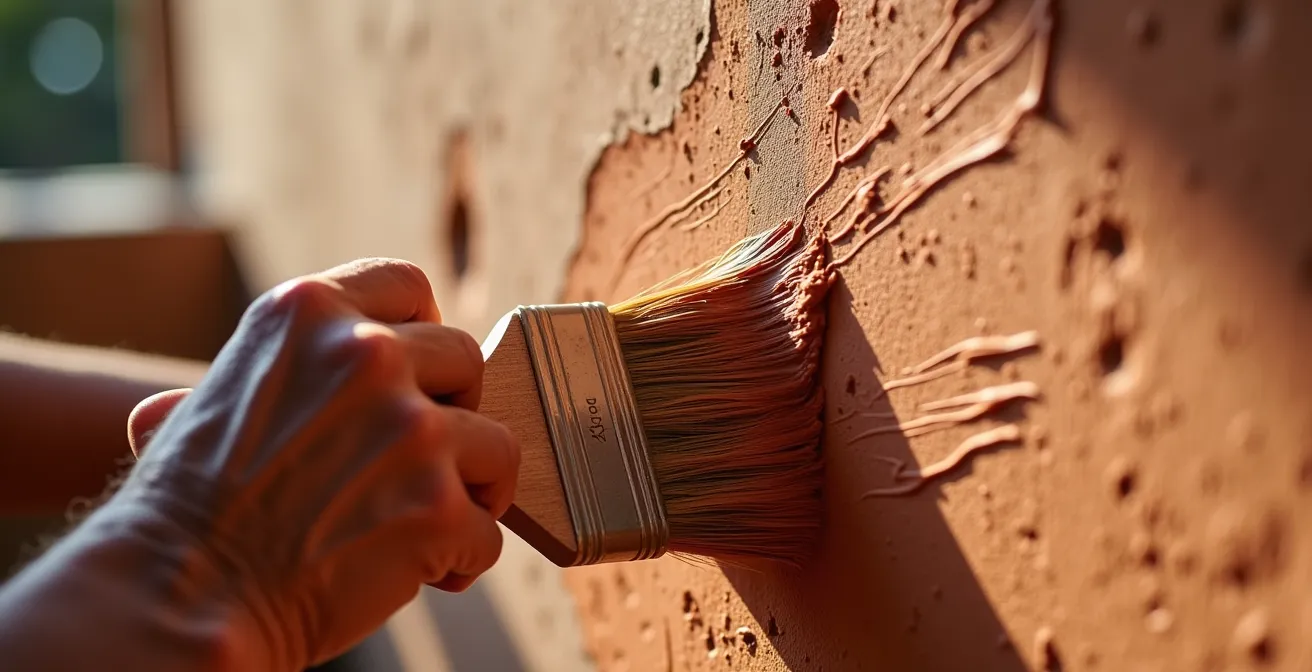
As shown in the image, the application is a tactile process. Maintaining a fairly stiff paint consistency is crucial to prevent a thin, washed-out application. For a full, opulent finish, two coats are typically required, with adequate drying time in between. Following a structured application method ensures not only a beautiful result but also optimizes the material’s performance. The key steps are:
- Prepare: Ensure walls are solid, clean, and absorbent. Prime untreated surfaces.
- Mix: Combine clay paint powder with cold water using a drill mixer, let it expand for 20-30 minutes, then stir thoroughly again.
- Apply First Coat: Use a 4-inch brush in diagonal or X patterns, keeping the paint consistency relatively thick.
- Maintain Conditions: Keep room temperature above 47°F (8°C) and stir paint frequently during use.
- Apply Second Coat: Allow at least 8 hours of drying time before applying the second coat with the same technique for full coverage, which can be up to 216 square feet per coat from a standard 2.3kg bag.
Low VOC vs Zero VOC: Which Label Actually Guarantees Safety ?
The terms “Low-VOC” and “Zero-VOC” have become central to marketing paints as “healthy,” but these labels can be dangerously misleading. To understand why, it’s essential to know what they officially mean. According to the Environmental Protection Agency (EPA), for a paint to be labeled “Zero-VOC,” it must contain 5 or fewer grams of VOCs per liter of base paint. “Low-VOC” is a much broader category, typically including paints with less than 250 grams per liter. While this seems straightforward, a critical loophole exists: these measurements are often taken *before* colorant is added.
This is where the promise of safety collapses. The color tints added at the hardware store are frequently loaded with their own VOCs. A “Zero-VOC” white base paint can become a significant source of indoor air pollution once a dark or vibrant pigment is mixed in. A case study from professional painters highlights this exact issue, noting that even a week after application, fumes from some tinted gloss paints were still potent enough to be felt in the nose. This demonstrates that the off-gassing period for these hidden chemicals is not a matter of hours or days, but can extend much longer, directly impacting your home’s air quality.
Case Study: The Hidden Danger of Post-Tinting VOC Increases
Professional painters have found that ‘Zero VOC’ base paints can become significant VOC emitters after colorants are added. While some brands like Benjamin Moore have addressed this by developing VOC-free tinting systems, it is not a universal standard. This discrepancy means a consumer might unknowingly bring high-VOC products into their home despite their best intentions, proving that the final tinted product’s specifications must be verified, not just the base paint’s label.
This variability makes relying on a simple label a gamble. A truly health-conscious approach requires looking beyond the marketing to the paint’s fundamental composition—whether it’s a synthetic formula that can accept high-VOC tints or a natural mineral paint that uses inert pigments. The following table breaks down the real-world differences.
| Paint Type | VOC Content | Off-gassing Duration | Health Risk Level |
|---|---|---|---|
| Standard Paint | 380+ g/L | 3-5 years | High – headaches, respiratory issues |
| Low-VOC Paint | 50-250 g/L | 6 months – 2 years | Moderate – mild irritation possible |
| Zero-VOC Paint (base) | <5 g/L | Days to weeks | Low – minimal risk |
| Zero-VOC Paint (after tinting) | Variable | Depends on colorants | Variable – check final specs |
The Durability Myth: Does Natural Paint Peel Faster Than Acrylic ?
A common misconception holding homeowners back from choosing natural paints is the fear that they are less durable than their synthetic counterparts. We’re accustomed to the tough, plastic-like finish of acrylic and latex paints and assume that a natural product must be delicate and prone to peeling or fading. This is a fundamental misunderstanding of how mineral-based finishes work. Unlike acrylics, which are essentially a layer of plastic sitting on top of the wall, lime wash and other mineral paints integrate themselves *into* the substrate through a chemical process.
The key to lime wash’s incredible longevity is a process called carbonation. When slaked lime (calcium hydroxide) is applied to a wall, it slowly reacts with carbon dioxide (CO2) from the air. This reaction transforms the lime back into its original state: limestone (calcium carbonate). In essence, the paint becomes a micro-thin layer of rock, bonded directly to the wall’s surface. It doesn’t form a film that can peel; it becomes part of the wall itself. This is why ancient buildings in Europe and the Mediterranean, coated in lime wash centuries ago, still stand with their original finishes intact and beautifully patinated.
This chemical transformation is not just a theory; it’s a well-documented scientific principle. As experts in materials science confirm, this process creates an incredibly resilient and long-lasting finish.
The reaction of slaked lime with atmospheric CO2 in the presence of humidity leads to the formation of cementing carbonate phases… creating a surface that becomes harder and more integrated with the wall over time, like stone.
– Cement and Concrete Research Journal, Carbonation mechanisms and kinetics of lime-based binders: An overview
Furthermore, because mineral paints are vapor permeable or “breathable,” they allow moisture to pass through the wall naturally. Synthetic paints trap this moisture, which is a leading cause of blistering and peeling. By allowing the wall to breathe, lime wash prevents the very problem that causes modern paints to fail. So, far from being less durable, a properly applied lime wash finish is one of the most resilient and long-lasting wall coverings available.
Cleaning Lime Wash Walls Without Damaging the Finish
Caring for a lime wash wall is different from scrubbing a standard acrylic surface, and it requires a gentler approach that respects the material’s nature. Because lime wash is a breathable, matte finish without synthetic binders, it does not have the “wipeable” plastic surface of modern paints. Aggressive scrubbing or harsh chemical cleaners can damage the delicate, crystalline structure and mar the finish. However, its inherent properties make it surprisingly low-maintenance.
One of the most significant advantages of this material is that the high pH of lime wash naturally provides anti-bacterial and mold-resistant properties, meaning the surface is inherently more hygienic and less prone to the issues that require harsh cleaning in the first place. For everyday dust and cobwebs, a soft brush or vacuum attachment is sufficient. For minor scuffs or smudges, the principle is to be as gentle as possible. The goal is to lift the stain without abrading the surface.
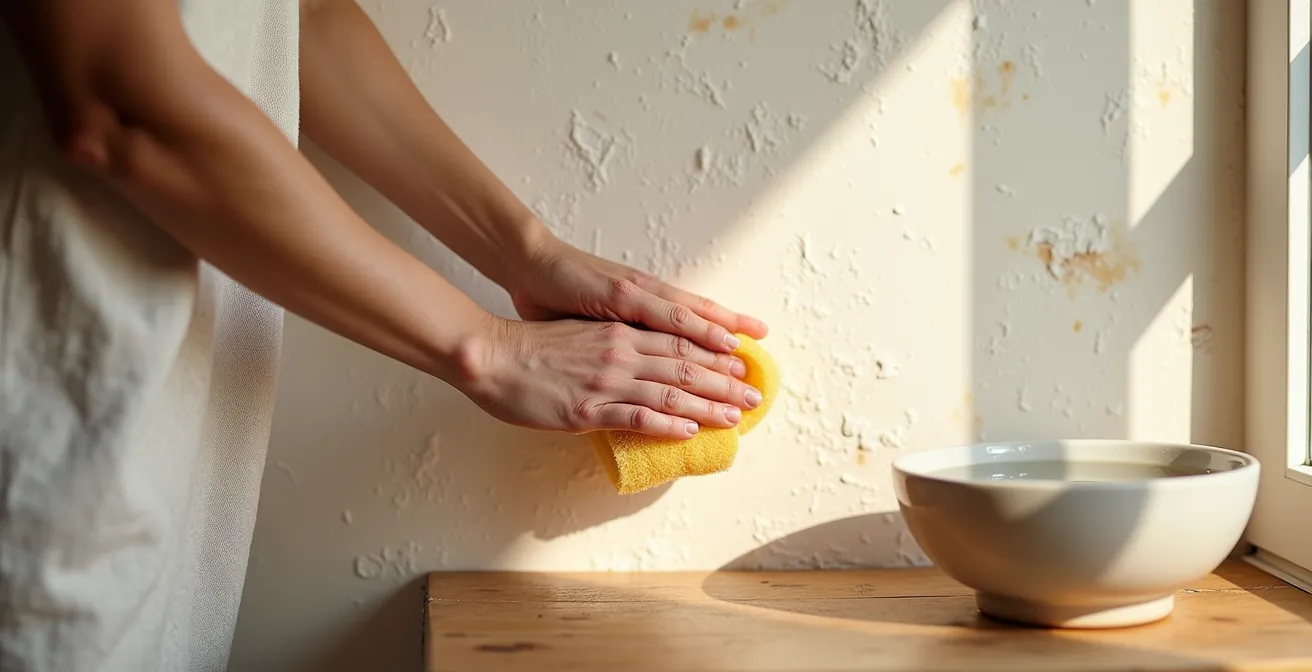
As the image illustrates, the correct technique involves blotting with a soft, natural sponge or microfiber cloth and clean water. Rubbing can create a polished or burnished spot on the matte surface. It’s crucial to avoid all all-purpose cleaners, especially acidic ones like vinegar, which will react chemically with the alkaline lime and permanently damage the finish. For more stubborn stains, the best solution is often to perform a small touch-up by applying a very thin, watery batch of the original lime wash to the affected area, allowing it to blend in seamlessly as it dries.
Action Plan: Safe Cleaning for Lime Wash Surfaces
- Choose Your Tools Wisely: Use only soft, natural sponges or microfiber cloths. Never use abrasive pads, magic erasers, or stiff brushes.
- Use Plain Water Only: Avoid all acidic cleaners (including vinegar) and detergents, which can react with the lime and cause discoloration.
- Blot, Don’t Rub: Gently blot any smudges or dirt. Rubbing can disrupt the delicate crystalline surface and create a shiny or worn patch.
- Spot Treat for Stains: For stubborn marks, mix a small, watery batch of your original lime wash and apply it sparingly as a spot treatment, feathering the edges.
- Allow to Air Dry: Let the surface dry naturally. Do not apply heat or use fans, which can cause the touch-up to cure improperly.
When is the Best Time of Year to Paint Exteriors with Natural Lime ?
Applying lime wash to an exterior is not just a matter of weather-proofing; it’s about initiating a natural chemical reaction. As we’ve learned, lime wash cures through carbonation—absorbing carbon dioxide from the atmosphere to turn back into limestone. This process is highly dependent on environmental conditions, making the timing of application critical for a successful and durable finish. Unlike synthetic paints that simply dry, lime wash requires a specific window of temperature and humidity to cure properly.
The ideal conditions for this carbonation process are moderate. Extreme heat, direct sunlight, low humidity, or freezing temperatures can all disrupt the curing and compromise the final result. If the lime wash dries too quickly—due to high heat or wind—it doesn’t have enough time to absorb the necessary CO2, resulting in a soft, chalky, and non-durable finish. Conversely, if temperatures drop near or below freezing before the initial cure is complete, the water in the wash can form ice crystals, destroying the bond with the substrate.
For these reasons, the best times of year for exterior lime washing are typically spring and autumn. These seasons generally offer the ideal balance of moderate temperatures and sufficient humidity.
Field Study: Environmental Conditions for Successful Lime Application
Application guidelines from material experts specify that the ambient temperature should not drop below 41°F (5°C) during the entire carbonation process, which takes 2-3 days for the critical initial phase. For darker colors, the minimum is higher, around 46°F (8°C). The ideal range is considered to be between 45-75°F (7-24°C) with a relative humidity of 50-75%. In very hot or dry conditions (above 86°F or 30°C), the substrate must be misted with water between coats to slow the drying process and allow for proper carbonation.
This highlights that working with natural materials requires an understanding of their inherent processes. Planning an exterior project means collaborating with the climate, not just finding a dry weekend. By choosing the right seasonal window, you ensure the lime wash has the time and conditions it needs to transform into a beautiful, stone-like layer that can protect the building for decades.
The Red Flags in Contractor Quotes That Signal Future Disasters
Choosing the right materials is only half the battle; ensuring they are applied correctly by a knowledgeable professional is just as important. When you’ve decided to invest in natural, health-conscious paints, the last thing you want is a contractor who cuts corners or substitutes cheaper, high-VOC products. A detailed contractor quote is your first line of defense. Vague or evasive language is a major red flag that can signal future problems, both for the finish and your family’s health.
A trustworthy contractor who is experienced with natural materials will provide a highly specific, itemized quote. They will understand that “surface prep” for a lime wash is different from that for an acrylic paint and will detail the steps accordingly. Be extremely wary of quotes that use generic terms like “Prep and Paint” without a breakdown of what that entails. Another significant warning sign is an “Product Equivalency” clause. This language gives the contractor permission to swap out the specified natural paint for a cheaper “equivalent,” which almost certainly will be a standard synthetic paint with higher VOC content and a completely different performance profile.
Furthermore, a health-conscious contractor will address air quality directly in their plan. Their quote should mention a ventilation strategy, the use of containment barriers to prevent dust and fumes from spreading, and potentially HEPA air scrubbers for sensitive environments. If a contractor dismisses your health concerns about VOCs or your preference for specific natural materials, consider it a deal-breaker. They are not the right partner for the job. To protect yourself, insist on a quote that acts as a precise blueprint for the project.
- Vague Terminology: Watch for generic phrases like ‘Prep and Paint’ instead of an itemized list of steps (e.g., ‘Clean surfaces, repair cracks, apply one coat of silicate primer’).
- Product Substitution Clauses: Beware of any ‘product equivalency’ language that allows them to use cheaper, higher-VOC alternatives.
- No Ventilation Plan: A red flag if the quote has no mention of containment, ventilation strategies, or HEPA air scrubbers.
- Dismissal of Health Concerns: A major warning sign if a contractor downplays the risks of VOCs or tries to talk you out of your material choices.
- Lack of Specificity: The quote must specify exact product lines and, ideally, batch numbers, not just brand names.
The Ventilation Requirement: Is Oil Painting Safe in a Bedroom ?
The bedroom is arguably the most important room in the house when it comes to air quality. We spend roughly a third of our lives there, in a relatively enclosed space, while our bodies are in a state of rest and repair. Introducing high levels of chemical pollutants into this environment can have significant health consequences. The immediate danger of painting is acute chemical exposure. Research shows that during and immediately after activities like paint stripping or painting with solvent-based products, VOC levels can be 1,000 times higher than background outdoor levels. This is a toxic spike that no one should be exposed to, especially during sleep.
However, the more insidious threat comes from long-term off-gassing. The initial, strong smell of paint is just the tip of the iceberg. Many of the chemical compounds released by drying paint are odorless, and the process continues long after the smell has dissipated. This is particularly true for synthetic latex and oil-based paints.
Case Study: Long-term Off-gassing in Bedroom Environments
A study on building materials revealed that off-gassing from most standard latex paints continues for 3-5 years, with some conditions extending this period up to 10 years. This is especially concerning in bedrooms, where occupants have prolonged daily exposure. The study emphasizes a critical point: smell is not an accurate test of toxicity. Some of the most potent organic compounds released are below the human odor threshold. Official guidance, such as that from Montgomery County, MD, recommends keeping windows open for a minimum of 48-72 hours after painting and considers bedrooms completely off-limits for sleeping during this period.
This extended chemical release is a primary contributor to the chronic health issues, like persistent headaches and respiratory irritation, linked to poor indoor air quality. Therefore, painting a bedroom—especially with a conventional oil or latex paint—is not a simple weekend project. It requires a robust ventilation plan and, ideally, a multi-day period where the room is completely unoccupied to allow for the most intense phase of off-gassing to pass. Better still is choosing a truly non-toxic, mineral-based paint that does not contain the synthetic compounds responsible for this long-term pollution in the first place.
Key Takeaways
- “Zero-VOC” labels are often misleading, as toxic VOCs can be added with color tints; the final chemical makeup is what matters.
- Natural mineral paints (lime, clay) are highly durable because they chemically bond with the wall (carbonation), preventing the peeling common with film-forming acrylics.
- True indoor air safety comes from choosing “breathable” paints with mineral binders, not synthetic polymers that off-gas for years.
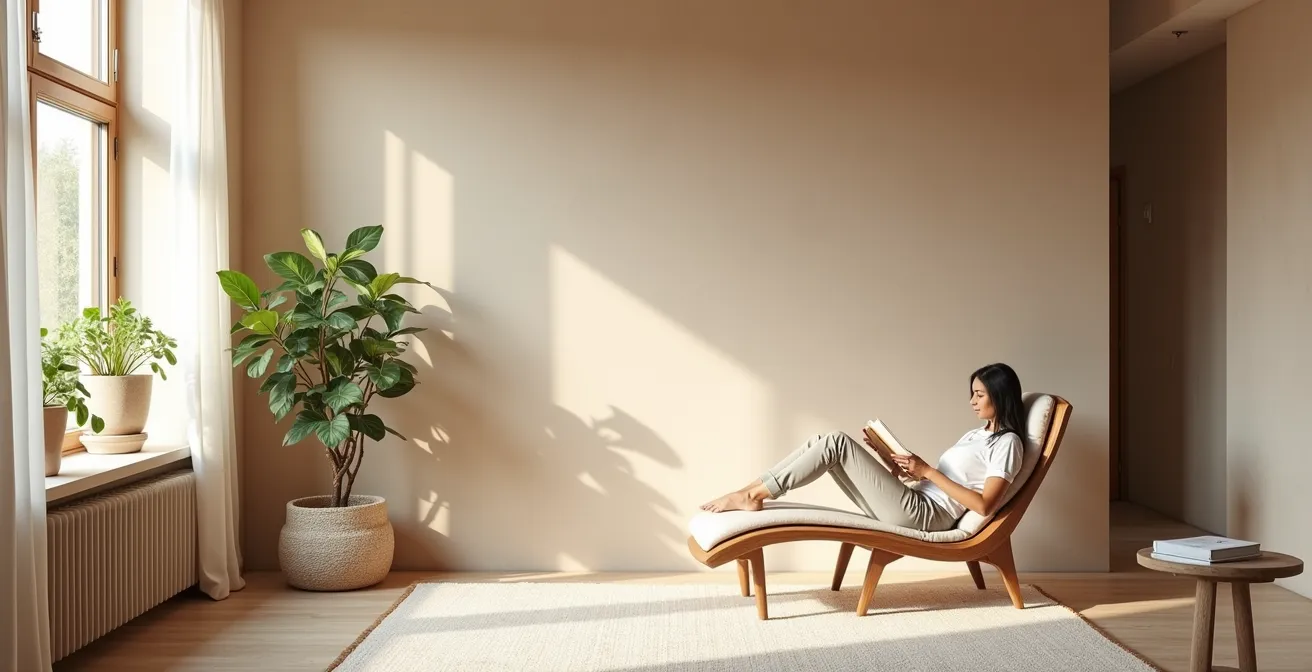
How to Layer Lighting to Make Small Rooms Feel Bigger ?
Once you’ve chosen a healthy, natural paint for your walls, the next step is to showcase its unique beauty. The rich, textural surfaces of clay and lime wash interact with light in a way that flat, synthetic paints cannot. By thoughtfully layering your lighting, you can not only enhance this beautiful finish but also create an illusion of greater space, making even small rooms feel more expansive and inviting. This goes beyond simply installing a bright overhead fixture; it’s about using light to create depth, dimension, and mood.
The strategy involves combining three types of lighting: ambient, task, and accent. Ambient light provides the room’s overall illumination (e.g., from ceiling fixtures or uplights). Task lighting is focused on specific activities, like a reading lamp by a chair. Accent lighting is where the magic happens for textured walls. Techniques like “wall grazing,” where lights are placed close to a wall, cast shadows that dramatically highlight the subtle variations in a lime or clay finish. This texture prevents the wall from looking like a flat, monolithic plane, which in turn gives the room a sense of depth.
The quality of the light itself is also crucial. Using high-CRI (Color Rendering Index) bulbs—ideally 90 or higher—is essential for revealing the true, complex tones of natural pigments. Standard LED bulbs can often wash out these subtle colors. By combining high-quality light sources with strategic placement, you can celebrate the material you’ve chosen and transform the perception of your space.
- Use Wall Grazing: Position accent lights or track lighting 6-12 inches from the walls to cast shadows that emphasize the natural texture of clay or lime paint.
- Choose High-CRI Bulbs: Install LED bulbs with a CRI of 90+ to ensure the rich, complex pigments of the natural paint are rendered accurately.
- Layer Your Lighting: Combine ambient (overall), task (focused), and accent (dramatic) lighting to build depth and avoid flat, uniform illumination.
- Create Diagonal Shadows: Position lights to create shadows that run diagonally across textured surfaces, which adds dynamism and a sense of movement.
- Combine with High-LRV Paint: Use light-colored natural paints with a high Light Reflectance Value (LRV) and pair them with uplighting to bounce light off the ceiling, maximizing the feeling of height and space.
Now that you are equipped with a deeper understanding of what truly makes a paint healthy, the next step is to apply this knowledge. Begin by scrutinizing the material data sheets of products rather than their marketing labels, and start planning your next project with true long-term well-being in mind.